


Last updated: October 2026
Greenhouse building is an effective way to grow vegetables, herbs, flowers, seedlings, and other plants in a more controlled environment. Whether you want a small backyard greenhouse for fresh produce or a larger structure for commercial cultivation, the right design can help you manage sunlight, temperature, humidity, irrigation, and growing conditions more effectively.
However, building a greenhouse involves more than installing a frame and covering it with transparent material. You need to consider the local climate, site drainage, structural strength, ventilation, covering materials, water supply, and long-term maintenance. A greenhouse that works well in a cool climate may overheat quickly in a hot, humid region.
This complete greenhouse building guide for 2026 explains how to choose a suitable design, estimate construction costs, select materials, prepare the site, build the structure, manage growing conditions, and evaluate commercial opportunities. It is designed for beginners, home gardeners, hobby growers, and people considering greenhouse farming as a business.
What Is Greenhouse Building?
Greenhouse building is the process of planning, designing, and constructing a structure that creates a more manageable environment for growing plants. A greenhouse typically uses a frame made from metal, wood, or another suitable material and a covering that allows sunlight to enter.
The covering may be glass, polycarbonate panels, fiberglass-reinforced plastic, or greenhouse-grade polyethylene film. Depending on the design, the structure may also include roof vents, side vents, fans, shade cloth, irrigation equipment, heating systems, and cooling systems.
The primary purpose of greenhouse construction is to make growing conditions more predictable. A properly designed greenhouse can help protect plants from certain weather conditions, reduce exposure to some pests, and extend the growing season.
A greenhouse does not automatically maintain ideal conditions. On a sunny day, the inside can become dangerously hot, while cold nights can still damage sensitive crops. Ventilation, temperature monitoring, irrigation, and crop management remain essential.
Why Is Greenhouse Building Worth Considering in 2026?
Greenhouses are useful for home gardening and commercial horticulture because they allow growers to manage growing conditions more precisely than they can in an open garden.
The main benefits include:
- Extended growing opportunities: Growers can start seedlings earlier or continue production beyond the usual outdoor growing period.
- Better environmental control: Ventilation, shading, irrigation, and other equipment can help regulate growing conditions.
- Weather protection: A suitable structure can reduce exposure to heavy rain, wind-driven damage, and certain other environmental hazards.
- Efficient water management: Drip irrigation and careful scheduling can deliver water closer to plant roots.
- Space-efficient cultivation: Benches, containers, vertical supports, and organized growing rows can make better use of available space.
- Specialized crop production: Greenhouses can support crops that need conditions different from those available outdoors.
- Commercial opportunities: Depending on local demand, growers may produce vegetables, flowers, nursery plants, herbs, or seedlings for sale.
These benefits depend on the crop, climate, construction quality, and management practices. Greenhouse production can also require more labor, electricity, maintenance, and initial investment than outdoor gardening.
Types of Greenhouses You Can Build
Choosing the right greenhouse design is one of the most important decisions in the project. The best option depends on your available space, budget, local weather, preferred crops, and required level of climate control.
1. Lean-To Greenhouse
A lean-to greenhouse shares a wall with an existing building. It can be convenient for small gardens because water and electricity may already be nearby.
Advantages:
- Makes efficient use of limited space.
- May provide convenient access to utilities.
- Can be practical for growing herbs, seedlings, and small quantities of vegetables.
Disadvantages:
- The neighboring building may block sunlight.
- The shared wall can restrict airflow.
- Attachment to an existing building requires suitable structural detailing and weatherproofing.
Best for: Beginners, patios, and small backyard gardens.
2. Hoop House or Quonset Greenhouse
A hoop house uses curved hoops covered with greenhouse film. It is relatively simple to assemble and is widely used for seasonal growing and protected cultivation.
Advantages:
- Often more affordable than rigid-panel structures.
- Uses a relatively lightweight frame.
- Greenhouse film is generally straightforward to replace.
Disadvantages:
- The film requires periodic replacement.
- Poorly designed structures may be vulnerable to wind.
- Insulation and climate control depend on the covering and additional equipment.
Best for: Budget-conscious gardeners and small growers.
3. Gable-Roof Greenhouse
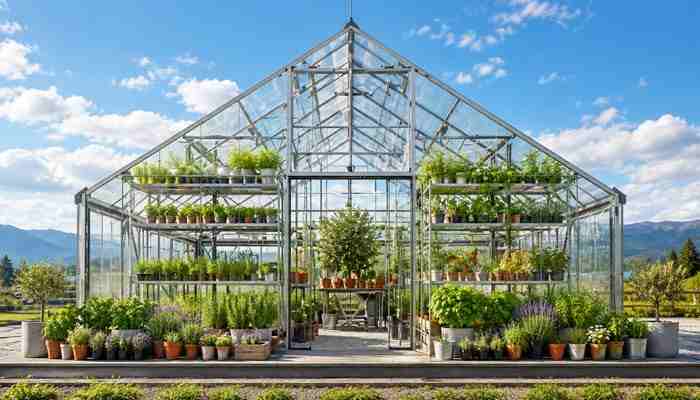
A gable greenhouse has two sloping roof sections that meet at a ridge. It can accommodate roof vents and provide useful headroom.
Advantages:
- Familiar, practical shape.
- Can support different covering materials.
- Suitable for permanent backyard structures.
Disadvantages:
- Requires a properly designed frame and foundation.
- Costs may increase with rigid panels and glazing systems.
Best for: Hobby gardeners and permanent backyard greenhouses.
4. Multi-Span Greenhouse
A multi-span greenhouse connects several growing sections under a shared roof system.
Advantages:
- Makes efficient use of larger sites.
- Can support organized commercial production.
- May allow shared irrigation and climate-control infrastructure.
Disadvantages:
- Requires detailed structural and drainage planning.
- Climate management can be more complicated.
- Initial investment and maintenance requirements can be substantial.
Best for: Commercial vegetable production, nurseries, and larger operations.
5. Cold Frame
A cold frame is a low enclosure with a transparent lid. It is not a full-height greenhouse, but it can protect seedlings and help gardeners experiment with protected growing on a small scale.
Advantages:
- Simple construction.
- Low space requirements.
- Useful for seedlings and small plants.
Disadvantages:
- Limited growing height.
- Requires monitoring to prevent overheating.
- Offers less environmental control than a full greenhouse.
Best for: Seed starting, small gardens, and simple DIY projects.
These designs are not interchangeable in every climate. An attached greenhouse may receive insufficient sunlight, while a large enclosed greenhouse can accumulate excessive heat without adequate ventilation.
Greenhouse vs. Polyhouse vs. Shade House
These terms are sometimes used interchangeably, but they describe structures with different purposes and coverings.
| Feature | Greenhouse or Polyhouse | Shade House |
|---|---|---|
| Main covering | Glass, plastic film, or rigid panels | Shade net or mesh |
| Primary purpose | Protected cultivation and environmental management | Reducing sunlight intensity and providing partial protection |
| Temperature control | Depends on ventilation, shading, and cooling systems | Primarily reduces solar exposure |
| Rain protection | Depends on roof and enclosure design | Usually limited unless a separate roof is installed |
| Typical uses | Vegetables, flowers, seedlings, and specialty crops | Shade-loving plants, nurseries, and hardening seedlings |
| Best suited to | Crops requiring a more controlled environment | Crops that benefit from shade and airflow |
A shade house may be more appropriate for crops that need protection from intense sunlight but do not require a fully enclosed growing environment. A greenhouse or polyhouse is generally more suitable when rain protection or closer environmental management is important.
The best structure depends on the crop and local climate rather than the assumption that a more enclosed building is always better.
How to Choose the Best Greenhouse Design and Size
Before buying materials, answer these questions:
- How much space can you dedicate to the structure?
- Will you grow plants year-round or only during a particular season?
- Does your area experience intense heat, heavy rain, strong winds, or snow?
- Will you grow plants directly in the ground, in containers, or in soilless media?
- Do you need a permanent foundation or a temporary structure?
- Will the greenhouse be used for personal gardening or commercial production?
- Can you afford ventilation equipment, irrigation, repairs, and replacement coverings?
- How will you access water, electricity, supplies, and harvested crops?
For a first project, a small freestanding hoop house or a simple gable greenhouse can be a practical starting point. Choose a more advanced structure when your crop requirements, budget, and local conditions justify the additional complexity.
How Big Should a Greenhouse Be?
Greenhouse size should reflect the number of plants you intend to grow, the growing method, the space needed for pathways, and the equipment you plan to install.
For example, a greenhouse measuring 3 meters by 4 meters has a floor area of 12 square meters. A 6-meter-by-10-meter greenhouse provides 60 square meters. The larger structure offers more growing space but also requires more covering material, ventilation capacity, irrigation infrastructure, and maintenance.
When planning the layout, account for:
- Growing beds or containers.
- Pathways for access and harvesting.
- Space for trellising and mature plants.
- Doors and ventilation openings.
- Water tanks, pumps, and filters where required.
- Storage for tools and supplies.
- Room for cleaning and repairing the structure.
Avoid filling every available square meter with plants. Accessible pathways and adequate spacing make crop management easier and can improve airflow around plants.
Example Greenhouse Layout for a 3 m by 4 m Backyard Structure
The following is an illustrative planning example, not a standard design or engineering drawing. Adapt the layout to the frame, door position, crop, local climate, and required ventilation.
- Footprint: 3 m wide × 4 m long, giving 12 m² of floor area.
- Access: Place a door at one short end, wide enough to carry trays, tools, and supplies safely.
- Growing area: Consider two narrow growing beds or benches along the sides, with a central walkway. Keep enough space to reach plants without stepping into beds.
- Watering: Route irrigation lines along the beds or benches and keep filters and valves accessible for cleaning.
- Ventilation: Position doors, side openings, or roof vents according to the greenhouse design. Do not block vents with benches or tall plants.
- Monitoring: Place a thermometer and humidity sensor near the crop canopy, out of direct sunlight and away from direct water spray.
- Storage: Keep fertilizers, tools, and other supplies in a safe, dry location outside the growing area when possible.
Before building, sketch the footprint to scale and mark the door swing, beds, walkway, vents, irrigation lines, and equipment. Confirm that the remaining space is practical for planting, pruning, harvesting, and cleaning.
A larger greenhouse, such as a 6 m × 10 m structure, needs the same planning process but may require additional access routes and dedicated equipment space.
How to Calculate Greenhouse Covering Material
The greenhouse floor area is not the same as the amount of covering material required. The covering must extend across the roof and sides, and additional material may be needed for overlaps, doors, end walls, and installation.
For a simple rectangular greenhouse, calculate the surface area of each section separately.
For example, a greenhouse measuring 6 meters wide and 10 meters long has a floor area of 60 square meters. If it has vertical side walls and a sloping roof, the covering requirement will be greater than 60 square meters.
To estimate the material requirement:
- Measure each wall and roof section.
- Calculate the area of each section using the appropriate geometric formula.
- Add the areas together.
- Account for overlaps, fastening systems, doors, and cutting waste.
- Confirm the final order quantity with the covering supplier or approved installation plan.
Do not purchase covering material based only on floor area. Incorrect estimates can lead to shortages, extra expenses, or poorly sealed joints.
Greenhouse Building Materials: What Should You Use?
A greenhouse consists of several connected components, including its foundation, frame, covering, fasteners, doors, ventilation openings, and optional growing systems. Each component affects durability, light transmission, cost, and maintenance.
1. Greenhouse Frame Materials
Galvanized steel
Galvanized steel provides a strong framework and is suitable for many hoop houses and commercial greenhouses. Protective galvanization helps resist corrosion, although damaged coatings and unsuitable fasteners can still cause problems.
Aluminum
Aluminum is lightweight and naturally corrosion-resistant. It is commonly used in prefabricated greenhouse kits, although the strength of individual profiles and connections must suit the intended structure.
Wood
Wood is accessible and easy to work with using common carpentry tools. It needs appropriate protection against moisture, decay, and insects. Use materials and treatments suitable for the intended growing environment.
For any frame, structural strength matters more than appearance alone. The design must account for wind uplift, lateral pressure, the weight of the covering, suspended equipment, and other loads that apply at the site.
2. Greenhouse Covering Materials
The covering determines how much light enters the greenhouse and how well the structure retains heat.
| Covering Material | Main Advantages | Main Disadvantages |
|---|---|---|
| Greenhouse-grade polyethylene film | Relatively affordable, lightweight, and easy to replace | Requires periodic replacement and secure installation |
| Twin-wall polycarbonate | Insulating air chambers and good impact resistance | Costs more than basic film and may need cleaning |
| Glass | Clear appearance and good light transmission | Heavy, breakable, and generally requires a stronger frame |
| Fiberglass-reinforced plastic | Lightweight compared with glass and available in rigid panels | Light transmission and appearance can deteriorate with age |
The actual performance of each material depends on its grade, thickness, construction, UV protection, installation quality, and maintenance. Double-layer film with an air space can improve insulation in some designs, while multiwall polycarbonate provides insulation through its internal air chambers.
Which covering is best for beginners?
For a budget-oriented greenhouse, greenhouse-grade UV-stabilized polyethylene film is often a practical choice. Polycarbonate is worth considering for a more permanent backyard structure. Glass is suitable when its weight, safety requirements, installation expense, and structural demands are manageable.
Avoid assuming that ordinary construction plastic will last as long as film specifically manufactured for greenhouse use. UV exposure can cause unsuitable plastic to degrade, become brittle, and tear.
3. Foundation and Fasteners
A foundation keeps the structure stable and transfers loads into the ground. Depending on the greenhouse, it may consist of engineered ground anchors, embedded posts, concrete footings, or a perimeter foundation.
Choose the system according to the frame design, soil conditions, drainage, local frost depth where applicable, and expected wind loads. Do not rely on a lightweight frame sitting on the ground without appropriate anchoring.
Use compatible, corrosion-resistant fasteners and greenhouse-specific film-locking or glazing systems. Sharp bolt ends, exposed metal edges, and poorly fitted connectors can damage coverings and weaken joints.
4. How to Compare Material Costs Over Time
The cheapest material to buy is not always the cheapest to own. Compare the expected service life, maintenance requirements, replacement intervals, insulation performance, and repair costs.
For example, polyethylene film may have a lower initial cost but require periodic replacement. Polycarbonate may cost more initially while offering a longer service life in suitable conditions. Glass can provide good light transmission but may require a stronger frame and careful handling.
Request specifications and warranties from suppliers. Compare products with similar dimensions, thicknesses, UV protection, and installation requirements rather than choosing on price alone.
Step-by-Step Greenhouse Building Process
Building a greenhouse is easier when the work is divided into clear stages. The exact method depends on the structure and site, but the following sequence is a useful starting point.
Step 1: Plan the Size, Layout, and Budget
Decide what you intend to grow, how much space is available, and whether the greenhouse is for personal use or commercial production.
Prepare a drawing showing the dimensions, doors, beds, walkways, vents, irrigation lines, and equipment. Include a budget for the frame, covering, foundation, installation, ventilation, irrigation, and ongoing maintenance.
Step 2: Prepare the Site
Remove debris and vegetation from the building area. Check drainage and grade the site as needed so water does not collect around the foundation.
Confirm that the location receives appropriate sunlight and provides access to water and electricity if required. Do not begin construction until the site and any required permissions have been checked.
Step 3: Install the Foundation and Anchors
Install the foundation or anchoring system according to the approved design. The correct method depends on soil conditions, structural loads, and the type of greenhouse.
For larger structures or locations exposed to strong winds, use a qualified professional to determine appropriate foundation and anchoring requirements.
Step 4: Assemble the Frame
Follow the manufacturer’s assembly instructions or the approved construction drawings. Check that the frame is aligned and that braces, connectors, and fasteners are installed correctly.
Do not make structural changes simply to speed up installation. Modifications can weaken the structure or affect its warranty.
Step 5: Fit the Covering
Install greenhouse film, panels, or glass using the appropriate fastening system. Avoid sharp edges, loose fittings, and poorly sealed joints.
Follow the covering manufacturer’s instructions for tension, overlap, fastening, and installation conditions. Inspect the finished covering for avoidable damage.
Step 6: Install Ventilation and Climate Equipment
Fit doors, roof vents, side vents, fans, shade systems, cooling pads, or heating equipment as required by the design and crop.
Check that vents open fully and that fans operate in the intended direction. Keep ventilation openings clear of benches, equipment, and tall plants.
Step 7: Install and Test Irrigation
Install drip lines, filters, valves, pumps, and any required fertigation equipment. Check for leaks and confirm that water reaches the intended growing areas evenly.
Test the system before planting so blockages, uneven flow, and pressure problems can be corrected.
Step 8: Test Before Planting
Operate the greenhouse without valuable crops for a suitable test period. Observe temperatures, humidity, airflow, drainage, and irrigation performance under different conditions.
Correct problems before planting. Record equipment settings and learn how to operate manual controls if automated systems fail.
How Long Does Greenhouse Construction Take?
The construction period depends on the greenhouse’s size, design, foundation, site preparation, material availability, weather, and installation method.
A small DIY structure may be assembled relatively quickly once materials and the site are ready. A larger commercial greenhouse can require considerably more time for engineering, foundation work, equipment installation, inspections, and commissioning.
Ask the supplier or contractor for a written schedule that includes site preparation, delivery, installation, testing, and handover.
How Much Does Greenhouse Building Cost in 2026?
Greenhouse building costs vary substantially by location, structure type, size, materials, foundation, climate-control equipment, labor, and intended use. A simple backyard greenhouse can cost far less than a commercial greenhouse with automated irrigation and cooling.
A useful budget should separate the following expenses:
| Cost Component | What It May Include |
|---|---|
| Site preparation | Clearing, grading, drainage, and access |
| Foundation and anchoring | Ground anchors, posts, footings, or perimeter foundation |
| Frame | Galvanized steel, aluminum, wood, and connectors |
| Covering | Greenhouse film, polycarbonate, glass, or other panels |
| Doors and ventilation | Doors, roof vents, side vents, and roll-up systems |
| Climate control | Fans, cooling pads, shade cloth, heaters, sensors, and controllers |
| Irrigation | Pipes, filters, pumps, valves, drip lines, and tanks |
| Installation | Labor, equipment, transport, and commissioning |
| Growing equipment | Beds, benches, containers, trellises, and storage |
| Ongoing expenses | Water, electricity, maintenance, repairs, and covering replacement |
Do not compare quotations based only on the advertised price per square meter. One quote may include installation and ventilation, while another may cover only the frame and film.
Greenhouse Building Cost in India
In India, greenhouse costs depend on the state, local labor and material prices, structure specifications, climate-control requirements, and the type of protected cultivation system.
There is no single construction price that applies to every project. A low-cost seasonal structure and a commercial greenhouse with automated climate control can have very different budgets.
For an accurate estimate, obtain itemized quotations from multiple suppliers. Ask each supplier to specify the frame material, covering grade, anchoring, ventilation, irrigation, installation, warranty, taxes, transport, and excluded items.
If you are planning to apply for financial assistance, confirm the current scheme’s eligible project specifications and cost norms separately. A supplier’s quoted price is not necessarily the same as the cost amount recognized under a government scheme.
Greenhouse Cost Calculator: A Worked Example
The following example demonstrates how to calculate a basic construction estimate. The rate is an assumed figure for arithmetic illustration, not a verified 2026 market price or official subsidy cost norm.
Suppose you plan to build a greenhouse measuring 6 meters by 10 meters.
- Length: 10 meters
- Width: 6 meters
- Floor area: 10 × 6 = 60 square meters
- Assumed construction rate: ₹1,500 per square meter
The basic estimate would be:
Estimated base cost = Floor area × Assumed rate per square meter
60 × ₹1,500 = ₹90,000
This ₹90,000 figure is only a hypothetical base calculation. It should not be treated as a supplier quotation or a complete turnkey budget. Actual project costs may be higher after accounting for the foundation, ventilation, irrigation, installation, transport, taxes, electrical work, cooling equipment, and other requirements.
To calculate a more realistic budget, add the costs of every item not included in the assumed rate. Replace the illustrative rate with current written quotations from suppliers serving your location.
How to Compare Greenhouse Quotes
Request itemized quotations that describe the same size and specification. Compare:
- Frame material, dimensions, and structural specifications.
- Covering material, thickness, UV protection, and warranty.
- Foundation and anchoring requirements.
- Doors, vents, fans, cooling pads, and shade systems.
- Irrigation, filtration, pumps, and controls.
- Transport, installation, taxes, and commissioning.
- Maintenance requirements and after-sales support.
- Payment milestones, delivery dates, exclusions, and defect remedies.
A lower quote may omit equipment or installation work that you will have to pay for separately. Compare the total cost of a complete, usable greenhouse rather than the initial headline price.
How to Choose the Best Location for a Greenhouse
The location affects light, drainage, access, temperature, and operating expenses. Review the site before finalizing the design.
1. Check Sunlight Availability
Choose a location that provides the light required by your intended crops. Observe shadows from buildings, walls, trees, and other structures throughout the day.
The best orientation depends on the greenhouse design, latitude, season, wind conditions, and crop requirements. Follow locally appropriate design advice rather than assuming one orientation is ideal for every site.
2. Ensure Proper Drainage
Avoid areas where water collects after rain or irrigation. Standing water can damage foundations, restrict root oxygen, and increase disease pressure.
Plan the ground slope and drainage routes so water moves away from the structure without causing problems on neighboring land.
3. Consider Wind Exposure
Strong winds can damage coverings, frames, and poorly anchored structures. Consider prevailing winds, exposed terrain, nearby windbreaks, and local storm conditions.
Windbreaks can help in some settings, but they must not block necessary sunlight or ventilation. The greenhouse itself still needs suitable structural design and anchoring.
4. Check Access to Water and Electricity
Reliable water is essential for plant growth. If the greenhouse uses fans, pumps, cooling systems, or automated controls, confirm that the electrical supply is appropriate.
Check water quality when necessary, especially if salinity or unsuitable pH could affect the crop or irrigation system.
5. Allow Space for Maintenance
Leave room for access, equipment servicing, covering replacement, drainage maintenance, and moving supplies. A greenhouse placed too close to a fence or building may be difficult to repair.
6. Evaluate Soil and Water Quality
If you plan to grow directly in the ground, evaluate the soil’s drainage, structure, pH, and salinity as appropriate. For container or soilless systems, consider the quality of the growing media and irrigation water.
Testing can help identify problems before they affect an entire crop.
Which Greenhouse Design Is Best for Your Climate?
Climate should guide the design, covering, ventilation, and equipment choices.
- Hot and sunny climates: Prioritize ventilation, shading, and suitable crop selection. Depending on the location and humidity, additional cooling may be needed.
- Hot and humid climates: Air movement and moisture management are particularly important. Evaporative cooling may be less effective when outdoor humidity is high.
- Cool climates: Insulation, heat retention, and appropriate ventilation may be more important. Heating requirements depend on the crop and the lowest expected temperatures.
- Windy locations: Structural strength, anchoring, bracing, and suitable covering attachment are essential.
- Areas with heavy rainfall: Roof design, drainage, foundation protection, and safe runoff management deserve particular attention.
- Locations with large temperature swings: Temperature monitoring and suitable ventilation controls can help manage daytime heat and nighttime cooling.
No single greenhouse design is ideal for every climate. When the structure is large, permanent, or exposed to severe weather, obtain local professional advice on structural design and environmental controls.
Greenhouse Ventilation and Temperature Control
Ventilation removes excess heat and helps manage humidity. The required system depends on the greenhouse dimensions, local weather, crop, and level of environmental control.
Natural Ventilation
Natural ventilation uses doors, side openings, roof vents, or roll-up sides to allow air to move through the greenhouse.
Its performance depends on wind, temperature differences, opening size, and greenhouse layout. Keep vents unobstructed and make sure they can be opened safely.
Mechanical Ventilation
Mechanical ventilation uses fans to move air through the structure. It can be useful when natural airflow is insufficient, particularly in warm weather.
Fan capacity and placement should match the greenhouse design. A fan system cannot compensate for every design problem, so it should be planned alongside inlet openings and the overall cooling strategy.
Evaporative Cooling
Evaporative cooling systems use the evaporation of water to reduce air temperature. Common arrangements include fan-and-pad systems.
Their effectiveness depends on outdoor humidity, air movement, equipment condition, and water supply. They generally work less effectively when the incoming air is already very humid.
Shade Cloth
Shade cloth reduces the amount of sunlight entering the greenhouse. The appropriate shade level depends on the crop, season, light intensity, and local climate.
Too much shade can reduce plant growth and crop quality. Select the shade material according to the crop’s light requirements rather than using the darkest available option.
Temperature and Humidity Monitoring
Use a suitable thermometer and humidity sensor to understand conditions inside the greenhouse. Place sensors near the crop canopy, away from direct sunlight, heating equipment, and water spray.
Record readings during different parts of the day. These observations can help you identify overheating, high humidity, and ventilation problems.
Why Humidity Management Matters
High humidity and condensation can encourage certain fungal and bacterial diseases, depending on the crop and environment. Poor airflow can also create uneven growing conditions.
Avoid unnecessary overwatering, maintain appropriate plant spacing, and remove diseased plant material promptly. Ventilation should be balanced against the crop’s temperature and moisture needs.
How to Choose Greenhouse Fans
When comparing fans, consider:
- Airflow capacity and the size of the greenhouse.
- Power consumption and electrical requirements.
- Suitability for the intended operating environment.
- Noise and maintenance requirements.
- Compatibility with vents, cooling pads, and controls.
- Availability of replacement parts and service.
For a commercial structure, ask a qualified supplier or designer to size the system for the greenhouse and local climate.
Greenhouse Irrigation and Growing Systems
The right growing system depends on the crop, water supply, available space, budget, and level of management you can provide.
Drip Irrigation
Drip irrigation delivers water near plant roots through emitters or drip lines. It can help control water delivery and reduce unnecessary wetting of leaves.
Filters, pressure regulation, and routine inspection are important. Clogged emitters can cause uneven plant growth, even when the system appears to be operating.
Growing in Soil
Growing directly in soil may be suitable where the ground has appropriate drainage and soil quality. Soil testing can help identify pH, nutrient, and salinity issues.
Prepare beds and pathways so workers can access plants without compacting growing areas unnecessarily.
Container and Soilless Growing
Containers and soilless systems can provide greater control over growing media and root conditions. They are used for crops that benefit from managed substrates or where native soil is unsuitable.
These systems require attention to irrigation frequency, nutrient supply, drainage, and the properties of the growing media.
Fertigation and Nutrient Management
Fertigation combines irrigation with the delivery of dissolved nutrients. It can be useful in greenhouse production but requires suitable equipment and careful management.
Follow crop-specific nutrient recommendations. Do not assume that adding more fertilizer will improve production; excessive nutrient concentrations can damage roots and contribute to nutrient imbalances.
Best Crops to Grow in a Greenhouse
Greenhouses can support a range of crops, but the best choice depends on local climate, available equipment, growing skills, and market demand.
| Crop | Potential Advantages | Key Considerations |
|---|---|---|
| Tomatoes | Widely grown and can be trained vertically | Need support, suitable temperatures, and consistent water and nutrient management |
| Cucumbers | Can produce substantial growth in suitable conditions | Require trellising, frequent monitoring, and crop-specific management |
| Bell peppers | Can benefit from protected cultivation | Sensitive to temperature extremes and nutrient imbalances |
| Leafy greens | May suit compact growing areas and short production cycles | Need suitable temperatures, moisture management, and reliable market access |
| Herbs | Can be grown in containers or beds | Demand, harvest frequency, and post-harvest handling vary |
| Flowers | May offer specialized market opportunities | Crop choice, quality requirements, and sales channels are important |
| Seedlings and nursery plants | Can serve gardeners, farms, and landscapers | Require sanitation, reliable propagation conditions, and consistent buyers |
How to Choose the Right Crop
Before investing, consider:
- Whether the crop suits the local climate and greenhouse design.
- The length of the growing cycle and expected harvest schedule.
- The cost of seeds, seedlings, nutrients, labor, and packaging.
- Likely saleable yield rather than theoretical maximum production.
- Local demand, competition, selling prices, and buyer requirements.
- Storage, transport, and post-harvest handling.
- The skills and time needed to manage the crop.
For commercial cultivation, speak with potential buyers before planting. A crop that grows well may still be financially unsuccessful if there is insufficient demand or if the selling price does not cover production and distribution costs.
Pest and Disease Management in a Greenhouse
A greenhouse can help reduce exposure to some pests, but it does not eliminate the risk of infestation or disease. Warm conditions, dense planting, and high humidity may favor certain pests and pathogens.
Useful prevention measures include:
- Inspect seedlings and new plants before bringing them inside.
- Keep tools, benches, containers, and growing areas clean.
- Remove weeds and plant debris that may harbor pests.
- Use suitable insect screens where appropriate.
- Monitor plants regularly for early signs of damage.
- Avoid unnecessary overwatering and poor airflow.
- Remove heavily infected plant material safely.
- Use crop-protection products only according to applicable labels and local regulations.
Integrated pest management combines monitoring, prevention, cultural practices, biological controls where appropriate, and carefully selected treatments. Identify the likely problem before applying a pesticide or other treatment.
Greenhouse Building Permits and Safety Requirements
Requirements vary by location, property type, greenhouse size, intended use, and whether the structure is permanent. Before construction, check with the relevant local authority about planning permissions, building rules, setbacks, drainage, electrical work, and any agricultural requirements.
For commercial projects, also check whether separate approvals apply to water use, electrical installations, business operations, or other site-specific matters.
Safety During DIY Greenhouse Construction
Greenhouse construction can involve heavy materials, sharp edges, ladders, power tools, and work at height.
Follow these precautions:
- Use appropriate protective equipment.
- Secure ladders and work areas.
- Handle glass and rigid panels carefully.
- Keep children and pets away from active construction.
- Do not work on coverings or frames during strong winds or lightning.
- Use qualified professionals for electrical installations and complex structural work.
- Do not modify load-bearing components without appropriate technical advice.
For a permanent or commercial greenhouse, obtain a design suited to local wind, rainfall, and other environmental loads.
How to Choose and Inspect a Greenhouse Contractor
A qualified contractor can help with design, installation, equipment selection, and commissioning. Compare more than the headline price.
Ask each contractor to provide a written quotation covering:
- Greenhouse dimensions and structural specifications.
- Frame and covering materials.
- Foundation and anchoring.
- Ventilation and cooling equipment.
- Irrigation and electrical systems.
- Installation schedule and payment milestones.
- Responsibility for permits and inspections.
- Maintenance instructions and after-sales support.
- Exclusions, replacement costs, and warranty conditions.
Check the contractor’s experience with structures of similar size and climate requirements. Request references or examples of completed projects where possible.
Avoid paying for a project based only on verbal promises about yields, savings, or profitability. These outcomes depend on growing practices, weather, market conditions, and equipment performance.
Greenhouse Installation Acceptance Checklist
Before accepting the completed greenhouse, inspect the following items.
- The frame is aligned and the specified braces and connectors are installed.
- Anchors and foundations match the approved design.
- Covering panels or film are properly secured and free of avoidable damage.
- Doors, vents, and roll-up sides open and close correctly.
- Drainage routes are clear and roof runoff is directed appropriately.
- Irrigation operates without leaks and delivers water evenly.
- Fans, pumps, controllers, and sensors operate as specified.
- Electrical installations have been checked by a qualified person.
- The supplier has provided warranties, manuals, and maintenance instructions.
- Any defects have been documented and resolved according to the contract.
Test the greenhouse systems before planting valuable crops. Keep written records of defects and the agreed steps for correcting them.
Greenhouse Maintenance and Troubleshooting
Regular inspections help extend the service life of the structure and reduce the risk of equipment failure.
Greenhouse Maintenance Checklist
- Inspect the frame, anchors, and connectors monthly and after severe weather.
- Check film, panels, seals, and fasteners for damage.
- Clean vents, fans, filters, and cooling pads according to use and manufacturer instructions.
- Test irrigation lines and check for leaks during active growing.
- Monitor temperature and humidity daily, with more frequent checks during extreme weather.
- Clear drainage channels and remove debris regularly.
- Check for pests, disease symptoms, and weeds.
- Review electrical protection and backup plans periodically.
- Inspect water filters and test water quality when necessary.
- Replace worn components before they cause larger problems.
Inspection frequency should increase during severe weather, intensive production, and periods when the greenhouse relies heavily on powered climate-control equipment.
Emergency Planning for Heat, Water, and Severe Weather
Plan for equipment or utility failures before planting, particularly if crops depend on powered fans, pumps, or automated vents.
- Ventilation failure or power loss: Know which doors, roof vents, or roll-up sides can be opened manually. If crop safety depends on powered ventilation, evaluate suitable backup power and test it periodically.
- Water interruption: Identify an emergency water source or storage option where practical. Store water safely and protect it from contamination.
- Severe weather: Follow local weather alerts, secure loose equipment, and inspect doors and coverings. Do not climb onto a greenhouse or attempt repairs during dangerous wind or lightning.
- Electrical or structural hazards: Keep people away from damaged frames, exposed wiring, flooded electrical equipment, or unstable panels. Call qualified help when needed.
- After an incident: Check the structure and utilities before restarting equipment or allowing people to enter. Document damage and prioritize safe repairs.
Emergency procedures do not replace adequate structural design, ventilation capacity, electrical protection, or routine maintenance.
Common Greenhouse Problems and Solutions
| Problem | Possible Causes | What to Check |
|---|---|---|
| Excessive heat | Insufficient ventilation, intense sunlight, inadequate shading | Vent openings, fan performance, shade system, and temperature readings |
| High humidity | Poor airflow, excessive watering, dense planting | Ventilation, irrigation schedule, plant spacing, and condensation |
| Uneven plant growth | Inconsistent irrigation, nutrient issues, shading | Water distribution, soil or media conditions, and light levels |
| Frequent pest outbreaks | Infected incoming plants, weeds, poor sanitation | Plant inspections, screens, crop hygiene, and monitoring traps |
| Waterlogged growing area | Poor drainage or irrigation leaks | Base grading, drainage routes, and water delivery |
| Damaged covering | Wind, sharp frame edges, unsuitable material, loose fasteners | Covering condition, attachment points, and structural movement |
| High operating expenses | Inefficient equipment, poor scheduling, excessive cooling | Electricity use, irrigation efficiency, equipment controls, and crop costs |
Investigate the underlying cause before replacing equipment or applying treatments. A recurring problem may indicate a design issue rather than a temporary maintenance failure.
Is Greenhouse Building Profitable?
Greenhouse building can support a profitable growing business, but profitability depends on production, selling prices, and total operating expenses.
Potential revenue sources include:
- Fresh vegetables and herbs.
- Cut flowers and ornamental plants.
- Seedlings and nursery plants.
- Specialty crops for local restaurants or retailers.
- Direct-to-consumer sales and subscription produce boxes.
Before construction, prepare a financial model that includes the initial investment, annual maintenance, seeds or seedlings, growing media, fertilizers, water, electricity, labor, packaging, transport, and expected crop losses.
Estimate realistic marketable yields rather than assuming every plant will produce a saleable harvest. Account for rejected produce, downtime between crops, seasonal price changes, and possible equipment failure.
How to Calculate Greenhouse Operating Costs
Separate initial investment from recurring expenses.
Initial investment may include:
- Structure, foundation, and covering.
- Irrigation and fertigation equipment.
- Ventilation, cooling, and climate-control systems.
- Installation, electrical work, and transport.
- Initial growing beds, benches, and other equipment.
Recurring expenses may include:
- Seeds, seedlings, and growing media.
- Fertilizers and crop-protection products.
- Water and electricity.
- Labor and packaging.
- Transport and marketing.
- Repairs, replacement materials, and equipment servicing.
- Loan interest and other financing expenses, where applicable.
Include depreciation or an appropriate replacement allowance when assessing the long-term financial performance of the greenhouse.
Greenhouse Break-Even Analysis: A Worked Example
Suppose a small commercial greenhouse has the following hypothetical annual figures:
- Annual sales revenue: ₹3,00,000.
- Annual operating expenses: ₹2,00,000.
- Annual operating profit before financing and tax: ₹1,00,000.
- Initial investment: ₹5,00,000.
For this simplified example, the assumed ₹2,00,000 in operating expenses represents the recurring costs included in the model. It is not a typical-cost benchmark for greenhouse businesses. Actual expenses depend on the crop, production method, labor requirements, utilities, repairs, packaging, transport, and other costs.
The calculation is:
Annual operating profit = Annual sales revenue − Annual operating expenses
₹3,00,000 − ₹2,00,000 = ₹1,00,000.
A simple operating return on initial investment would be:
Simple operating ROI = Annual operating profit ÷ Initial investment × 100
₹1,00,000 ÷ ₹5,00,000 × 100 = 20%.
The simple payback period would be five years if the greenhouse generated ₹1,00,000 in annual cash surplus consistently and no other cash-flow adjustments were required.
These figures are illustrative only. They do not represent typical greenhouse earnings or guarantee a 20% return. The calculation excludes financing costs, taxes, depreciation, equipment replacement, and the value of the owner’s labor. Actual returns and payback periods depend on production, market prices, operating expenses, and cash flow. Evaluate multiple scenarios before investing.
How to Estimate Break-Even Sales
For a more useful break-even calculation, separate fixed costs from variable costs.
- Fixed costs: Expenses that generally do not change directly with production volume, such as certain insurance, rent, and annual equipment costs.
- Variable costs: Expenses that increase or decrease with production, such as seeds, growing media, packaging, and some labor and delivery costs.
A simplified formula is:
Break-even sales revenue = Fixed costs ÷ Contribution margin ratio
The contribution margin ratio is the proportion of sales revenue remaining after variable costs.
For example, if annual fixed costs are ₹60,000 and the contribution margin ratio is 40%, the simplified break-even sales revenue is:
₹60,000 ÷ 0.40 = ₹1,50,000.
This is a simplified planning model. A real greenhouse business may have multiple crops, seasonal sales, changing prices, and costs that do not fit neatly into fixed and variable categories.
Common Financial Risks
Before investing, consider these risks:
- Market prices may fall during harvest.
- Pests or diseases may reduce saleable production.
- Electricity or water costs may increase.
- Equipment failure may damage crops during extreme weather.
- Buyers may delay payment or reject produce.
- The greenhouse may take longer than expected to reach consistent production.
- Specialized structures may be expensive to repair or modify.
Test the business model on a manageable scale before expanding. Confirm that you can sell the expected harvest at prices that cover the full cost of production and distribution.
Greenhouse Subsidies and Financial Assistance in India
Some government horticulture programs in India may offer financial assistance for protected cultivation, including eligible greenhouse or polyhouse projects. Assistance is subject to the scheme, location, beneficiary eligibility, approved structure specifications, funding availability, and applicable cost limits.
Start with these official resources:
- Mission for Integrated Development of Horticulture (MIDH): Consult the official MIDH guidelines and information about protected cultivation.
- National Horticulture Board (NHB) scheme guidelines and updates: Review the official NHB scheme guidelines.
- NHB public circulars: Check official NHB circulars and notices. This is particularly relevant for checking changes to application status.
How to Verify Your Eligibility Before Applying
Use this short checklist to verify the requirements for your specific project:
1. Identify the applicable scheme: Contact your state or district horticulture department and ask which protected-cultivation programs apply to your location and project.
2. Confirm that applications are open: Check the current official notices and ask whether funds remain available under the relevant program.
3. Verify eligible structures and cost norms: Confirm the approved greenhouse types, eligible area, technical specifications, and basis used to calculate assistance.
4. Ask about prior approval: Establish whether registration, technical approval, site inspection, or application acceptance is required before construction or purchase.
5. Confirm supplier and documentation rules: Ask whether an approved supplier or contractor is required and obtain the current document checklist.
6. Understand payment timing: Confirm whether assistance is paid before construction, after inspection, as reimbursement, or through another process.
7. Keep written records: Retain the relevant guidelines, application requirements, approvals, quotations, invoices, and payment conditions.
Requirements may vary by state, district, scheme, and financial year. A supplier’s statement that a project qualifies for assistance is not a guarantee of approval. Verify the current rules directly with the responsible department before committing money.
Common Greenhouse Building Mistakes to Avoid
- Choosing a poorly drained or shaded site.
- Overlooking ventilation, shading, and water quality.
- Using unsuitable coverings or weak foundations.
- Underestimating running and maintenance costs.
- Ignoring permits and structural requirements.
- Planting before inspecting and testing equipment.
- Expanding without experience or proven demand.
Greenhouse Building Checklist Before You Start
Before buying materials or hiring a contractor, check these essentials.
- Define your purpose, crops, and greenhouse size.
- Assess sunlight, drainage, wind, and water access.
- Choose suitable materials, foundations, and anchors.
- Confirm permits and compare itemized quotes.
- Budget for equipment, utilities, and maintenance.
- Plan irrigation, ventilation, and pest prevention.
- Check commercial viability and subsidy eligibility.
- Inspect the structure and test equipment before planting.
Greenhouse Building FAQs
1. What is the cheapest way to build a greenhouse?
A small DIY hoop house with greenhouse-grade polyethylene film and secure ground anchors is often an economical option. Costs depend on local materials, structure size, and site preparation.
2. Does greenhouse building require a concrete foundation?
Not always. Some designs use ground anchors or embedded posts, while others need concrete footings. The right foundation depends on soil conditions, structural loads, and local requirements.
3. Can you build a greenhouse without electricity?
Yes. Small greenhouses can use manual vents, natural airflow, and gravity-fed irrigation. However, extreme temperatures may require powered cooling or heating.
4. Does a greenhouse need ventilation in winter?
Yes. Winter ventilation helps control humidity and excess heat on sunny days. Adjust airflow carefully to avoid excessive heat loss.
5. How long does greenhouse plastic last?
Lifespan varies with UV protection, material quality, weather exposure, and installation. Check the manufacturer’s stated service life and warranty before buying.
6. Can you grow vegetables year-round in a greenhouse?
Yes, if crop selection and growing conditions suit your climate. Year-round production may require heating, cooling, supplemental lighting, or seasonal crop changes.
7. How much covering material does a greenhouse need?
Calculate the surface area of the roof, walls, and ends. Include allowances for overlaps, fastening, and cutting waste according to the installation instructions.
8. How do I choose a greenhouse building contractor?
Compare detailed quotations, structural specifications, ventilation provisions, warranties, and installation terms. Check references from similar projects and confirm which costs are excluded.
Final Thoughts
Greenhouse building is a practical way to create a more controlled growing environment, whether you want fresh vegetables at home, a seedling nursery, or a commercial cultivation operation. The most successful projects begin with a clear purpose, a suitable site, a climate-appropriate design, and a realistic budget.
For beginners, the best approach is to start with a manageable structure and prioritize drainage, anchoring, ventilation, covering quality, water management, and reliable irrigation. Test the growing environment before planting and maintain the structure according to its materials and equipment.
If you are considering commercial greenhouse farming, evaluate crop demand, production costs, operating expenses, and potential financial risks before investing. Use current supplier quotations for construction budgeting and verify the latest subsidy rules and application status through official sources.