


Last updated: October 2026
Blurry photographs are one of the most common frustrations for photographers, especially when shooting handheld in low light, using a telephoto lens, or working with naturally unsteady hands.
If you’re searching for how to fix shaky hands photography, the answer usually isn’t simply “hold the camera tighter.” Sharp handheld photography depends on several factors, including shutter speed, focal length, aperture, ISO, image stabilization, shooting technique, and whether the subject itself is moving.
The good news is that you can dramatically reduce blurry photos without always carrying a tripod.
This guide explains how to fix shaky hands photography with practical camera settings, better shooting techniques, stabilization technology, and useful accessories. It also explains how to determine whether your problem is actually camera shake or something else.
What Causes Shaky Photos?
A photograph can look blurry for several different reasons.
The most common causes are:
- Camera movement during exposure
- Subject movement
- A shutter speed that is too slow
- Poor camera-holding technique
- Long focal lengths
- Low-light conditions
- Incorrect autofocus
- Insufficient depth of field
- Lens or equipment problems
- Vibrations from pressing the shutter button
Camera shake occurs when the camera moves while the exposure is being recorded. The resulting blur can affect the entire frame and may appear as a ghost-like or shifted image.
However, not every blurry photograph is caused by shaky hands.
That distinction is extremely important.
Camera Shake vs. Motion Blur vs. Missed Focus
Before changing your settings, determine what is actually causing the problem.
| Problem | What the Photo Usually Looks Like | Main Solution |
|---|---|---|
| Camera shake | Most or all of the frame looks smeared | Increase shutter speed, stabilize camera |
| Subject motion | Moving subject is blurred while stationary areas may be sharp | Increase shutter speed |
| Missed focus | Wrong part of image is sharp | Improve autofocus or focus technique |
| High ISO noise | Grainy but potentially sharp | Improve lighting/exposure |
| Lens softness | Details lack clarity consistently | Check lens, aperture and technique |
| Depth-of-field problem | One part is sharp while another is intentionally out of focus | Adjust aperture/focus |
This distinction is one of the most important parts of learning how to fix shaky hands photography.
The Most Important Setting: Shutter Speed
If camera shake is your main problem, start with shutter speed.
Shutter speed determines how long the sensor is exposed to light. A faster shutter speed reduces the amount of time in which camera movement can affect the photograph. A slower shutter speed gives movement more opportunity to appear as blur.
For example:
- 1/30 sec gives you relatively little protection against movement.
- 1/60 sec can work with a wide lens and good technique.
- 1/125 sec is a useful general handheld starting point.
- 1/250 sec is safer for many portraits and moving subjects.
- 1/500 sec or faster is useful for significant movement.
There is no universal shutter speed that guarantees sharpness.
The Reciprocal Shutter-Speed Rule Explained
A traditional starting point for avoiding camera shake is to use a shutter speed at least as fast as the reciprocal of your focal length.
For example:
- 24mm → around 1/25 sec
- 35mm → around 1/40 sec
- 50mm → around 1/50–1/60 sec
- 85mm → around 1/100 sec
- 100mm → around 1/100–1/125 sec
- 200mm → around 1/200–1/250 sec
- 400mm → around 1/400–1/500 sec
Treat this as a starting point rather than a strict rule.
The practical minimum shutter speed can vary with camera resolution, sensor or crop format, focal length, stabilization, shooting technique, subject distance, and how large you plan to view or print the photograph.
Your actual minimum shutter speed depends on:
- How steady you are
- Camera resolution
- Focal length
- Subject distance
- Image stabilization
- Whether you are shooting from a stable position
- How much you enlarge the final image
If your photographs are still blurry at the reciprocal shutter speed, increase it.
Why Telephoto Lenses Need Extra Care
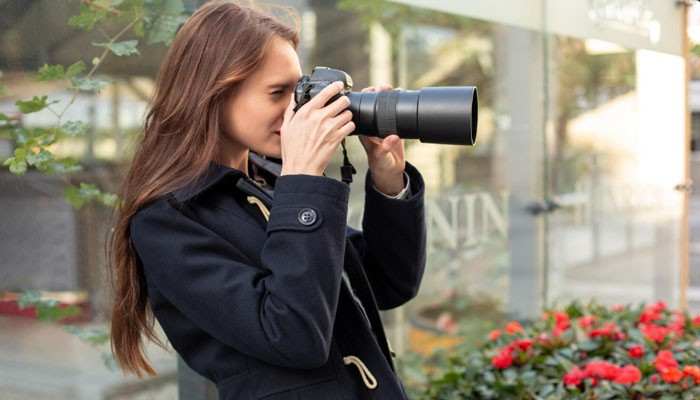
Long lenses make camera shake more noticeable.
A tiny movement at 24mm may barely affect the composition. The same movement at 400mm can become much more obvious.
That’s why wildlife, sports, and bird photographers often use relatively fast shutter speeds even when the subject isn’t moving extremely quickly.
For example, with a 400mm lens, starting around 1/500 sec can be more practical than trying to handhold at 1/100 sec.
Best Shutter Speeds for Different Situations
Use this table as a starting point rather than a strict formula.
| Photography Situation | Suggested Starting Shutter Speed |
|---|---|
| Static subject, wide-angle lens | 1/30–1/60 sec |
| General handheld photography | 1/125 sec |
| Portraits | 1/125–1/250 sec |
| Walking people | 1/250 sec |
| Children | 1/250–1/500 sec |
| Pets | 1/250–1/500 sec |
| Sports | 1/500–1/2000 sec or faster |
| Wildlife | 1/500 sec or faster |
| Birds in flight | 1/1000 sec or faster |
| Long telephoto lens | Often 1/500 sec or faster |
The right shutter speed depends on camera movement, subject movement, focal length, and image stabilization. Adjust these starting settings based on the sharpness you see in your photos.
Increase ISO Instead of Accepting a Blurry Photo
One of the biggest beginner mistakes is keeping ISO artificially low.
Suppose you’re indoors and your camera gives you:
ISO 400 — 1/30 sec — f/2.8
The low ISO may look attractive, but 1/30 sec may be too slow.
Instead, you could try:
ISO 1600 — 1/125 sec — f/2.8
The second photograph may contain more noise, but it has a much better chance of being sharp.
Modern cameras can handle higher ISO values better than many older cameras, although increasing ISO can still increase visible noise.
For handheld photography, sharpness usually matters more than preserving the lowest possible ISO.
Use Auto ISO to Prevent Slow Shutter Speeds
Auto ISO can help reduce camera shake by keeping your shutter speed fast enough for handheld photography.
Many cameras let you set a minimum shutter speed when using Auto ISO in Aperture Priority mode. As the light drops, the camera raises ISO to maintain that speed. However, once it reaches your maximum ISO limit, it may use a slower shutter speed.
Start with Aperture Priority + Auto ISO + a minimum shutter speed of 1/125 sec. For moving subjects, try 1/250 sec or 1/500 sec.
A Useful Auto ISO Starting Point
| Situation | Minimum Shutter Speed |
|---|---|
| Static subjects | 1/60–1/125 sec |
| General handheld photography | 1/125 sec |
| Portraits | 1/125–1/250 sec |
| Children | 1/250–1/500 sec |
| Sports | 1/500 sec or faster |
| Long telephoto lens | 1/500 sec or faster |
Adjust these settings for your focal length, subject movement, and steadiness. Auto ISO options and menu names vary by camera.
Open the Aperture When You Need More Light
A wider aperture allows more light to reach the sensor.
For example:
f/5.6 → f/2.8
can give you more exposure flexibility and help maintain a faster shutter speed.
Fast lenses such as:
- f/1.4
- f/1.8
- f/2
- f/2.8
are therefore useful for handheld photography in low light.
However, wider apertures produce shallower depth of field.
If you’re photographing several people, shooting extremely wide open may make it harder to keep everyone within the sharp focus zone.
The goal isn’t simply to use the widest aperture available. Choose an aperture that provides the required depth of field while allowing a sufficiently fast shutter speed.
Turn On Image Stabilization
Modern cameras and lenses may provide image stabilization in the lens, camera body, or both.
Different manufacturers use different names, including:
- IBIS
- IS
- OIS
- VR
- SteadyShot
- VC
The purpose is broadly the same: compensate for certain types of camera movement.
Image stabilization can be particularly useful when shooting handheld at shutter speeds that would otherwise be difficult to manage.
What Image Stabilization Cannot Fix
Image stabilization is powerful, but it isn’t magic.
It primarily helps with camera movement.
It doesn’t automatically freeze a moving person.
Imagine photographing someone indoors at:
1/15 sec
Your camera may successfully compensate for your hand movement, but if the person moves during the exposure, that person can still appear blurred.
The solution is to increase shutter speed.
This is why a photographer can sometimes have a sharp background but a blurry person.
Camera Shake
The camera moves.
Solution: stabilization, faster shutter speed, better technique, tripod.
Subject Movement
The subject moves.
Solution: faster shutter speed, better lighting, flash where appropriate.
How to Hold Your Camera for Maximum Stability
Your physical technique can make a significant difference.
Try this:
- Hold the camera grip securely with your right hand.
- Support the lens from underneath with your left hand.
- Keep your elbows relatively close to your body.
- Bring the camera toward your face.
- Keep your shoulders relaxed.
- Stand with one foot slightly ahead of the other.
- Keep your body balanced.
- Press the shutter gently.
Avoid gripping the camera so tightly that your entire body becomes tense.
The goal is controlled stability rather than maximum muscular tension.
Brace Your Body Against Something Solid
You don’t always need a tripod.
Look around for something stable:
- Wall
- Tree
- Pillar
- Railing
- Door frame
- Table
- Fence
- Vehicle
- Building column
You can also rest your elbows on a stable surface.
For travel and street photography, this can be an easy way to gain stability without carrying additional equipment.
Improve Your Stance
Your feet can act as your first support system.
Try:
- One foot slightly forward
- Knees relaxed
- Shoulders relaxed
- Elbows close to the body
- Camera close to your face
- Weight distributed evenly
Avoid leaning excessively backward while holding the camera away from your body.
A stable stance becomes even more important when using a large telephoto lens.
Control Your Breathing
Breathing creates subtle body movement.
When photographing a static subject at a borderline shutter speed:
- Frame the image.
- Take a normal breath.
- Relax your shoulders.
- Exhale naturally.
- Press the shutter smoothly.
You don’t need to hold your breath for an extended period.
The objective is simply to avoid pressing the shutter during an obvious movement of your body.
Press the Shutter Smoothly
Don’t punch or jab the shutter button.
Place your finger naturally on the release and apply pressure gradually.
This is particularly important when shooting at slower shutter speeds.
Use Burst Mode
Burst mode can improve your chances of getting a sharp frame.
Instead of taking one photograph, capture a short sequence.
This can be useful for:
- Portraits
- Wildlife
- Children
- Events
- Handheld telephoto photography
It isn’t a substitute for a sufficiently fast shutter speed, but small differences in hand movement between consecutive frames can sometimes make one frame noticeably sharper than another.
Use a Tripod for Very Slow Shutter Speeds
When the subject is stationary and your required shutter speed becomes too slow for reliable handheld photography, use a tripod.
A tripod is particularly useful for:
- Night landscapes
- Architecture
- Long exposures
- Product photography
- Still life
- Astrophotography
- Macro photography
- Interior photography
- Timelapse work
Tripod vs. Monopod vs. Handheld
| Support Method | Best For | Main Advantage |
|---|---|---|
| Handheld | Fast-moving situations | Maximum mobility |
| Monopod | Sports and wildlife | Added support while maintaining mobility |
| Tripod | Static subjects and long exposures | Maximum stability |
| Wall or railing | Travel and street photography | Convenient support when available |
| Beanbag | Wildlife and low-angle photography | Flexible support on uneven surfaces |
A tripod is not always the best choice. For fast-moving subjects, a faster shutter speed and freedom to move may matter more. Camera support reduces camera shake, but it does not prevent blur caused by subject movement.
Use a Remote Release or Self-Timer
Even when your camera is on a tripod, pressing the shutter can introduce movement.
A remote shutter release or self-timer lets you trigger the camera without physically touching it during exposure.
This is especially useful for:
- Long exposures
- Night landscapes
- Product photography
- Architecture
- Macro
- Astrophotography
Should You Turn Stabilization Off on a Tripod?
There is no universal answer.
Some older stabilization systems could potentially introduce movement when left active on a rigid tripod. Modern cameras and lenses can behave differently, with some systems detecting tripod use or offering dedicated settings.
Therefore:
Don’t automatically turn stabilization off or leave it on without checking your equipment’s instructions.
The correct setting depends on the specific camera and lens.
Choose the Right Shooting Mode
Aperture Priority
Aperture Priority lets you choose the aperture while the camera determines shutter speed.
It’s useful when depth of field matters.
But watch the shutter speed.
If it drops too low, increase ISO or open the aperture.
Shutter Priority
Shutter Priority is useful when preventing motion blur is the priority.
For example:
1/250 sec
can be selected for a portrait of a moving person.
The camera then chooses an appropriate aperture and, depending on the camera configuration, ISO.
Manual + Auto ISO
Manual exposure combined with Auto ISO can be extremely useful for experienced photographers.
For example:
1/250 sec + f/2.8 + Auto ISO
locks the two settings most directly related to sharpness and depth of field while allowing ISO to change with the available light.
This approach is especially useful when lighting changes quickly.
Best Camera Settings for Shaky Hands
Use these settings as practical starting points, then adjust for the light, focal length, and subject movement.
| Situation | Shutter Speed | Aperture | ISO |
|---|---|---|---|
| Static outdoor subject | 1/125 sec | f/5.6–f/8 | Low or Auto |
| General handheld photography | 1/125 sec | f/4–f/5.6 | Auto |
| Portrait | 1/125–1/250 sec | f/1.8–f/4 | Auto |
| Indoor portrait | 1/125–1/250 sec | f/1.8–f/2.8 | Auto |
| Children | 1/250–1/500 sec | f/2.8–f/5.6 | Auto |
| Pets | 1/500 sec | f/2.8–f/5.6 | Auto |
| Sports | 1/500–1/2000 sec or faster | f/2.8–f/5.6 | Auto |
| Long telephoto lens | 1/500 sec or faster | Depends on subject | Auto |
| Static night scene with a tripod | As needed for exposure | f/5.6–f/11 | Low |
These are starting points, not rigid rules. If camera shake still causes blur, increase the shutter speed, enable image stabilization when shooting handheld, or use additional support.
How to Fix Shaky Hands Photography in Low Light
Low light is where camera shake becomes most difficult.
The camera needs more light, and if you don’t compensate, it may select a shutter speed that is too slow.
Try this sequence:
1. Set a Safe Shutter Speed
Start around 1/125 sec for a relatively static handheld subject.
2. Open the Aperture
Use a wider aperture if your depth-of-field requirements allow it.
3. Increase ISO
Allow the camera to use the shutter speed you need.
4. Enable Image Stabilization
Use your camera or lens stabilization when appropriate.
5. Improve Your Physical Support
Brace yourself against something stable.
6. Add Light
A flash or continuous light can allow a faster shutter speed.
How to Fix Shaky Hands Photography Without a Tripod
If you don’t have a tripod, you still have several options.
Try:
- Increase shutter speed
- Increase ISO
- Open the aperture
- Turn on image stabilization
- Use a wider focal length
- Brace against a wall
- Rest your elbows on a solid surface
- Support the camera with both hands
- Use a monopod
- Use a railing or table
- Use burst mode
- Use a remote or self-timer when appropriate
For travel and street photography, these techniques are often more practical than carrying a full-size tripod.
How to Fix Shaky Hands With a Smartphone
The same basic principles apply to smartphone photography.
Modern phones often combine:
- Optical stabilization
- Sensor-shift stabilization
- Electronic stabilization
- Computational photography
- Multi-frame processing
But stabilization does not completely eliminate motion blur.
If you’re photographing a moving subject indoors, try:
- Using a brighter area
- Avoiding extreme digital zoom
- Holding the phone with both hands
- Bracing your arms against your body
- Using the phone’s faster-motion or action mode when available
- Adding light
- Taking several frames
If the phone allows manual controls, increasing shutter speed can directly address motion blur.
How to Fix Shaky Hands With a Telephoto Lens
Telephoto photography requires extra care because magnification makes small movements more visible.
Try:
- Increase shutter speed.
- Enable lens or body stabilization.
- Support the lens with your left hand.
- Keep the camera close to your body.
- Use a monopod when practical.
- Brace the lens or camera against a stable surface.
- Use burst shooting.
- Check sharpness at 100% magnification.
For extremely long lenses, a tripod or monopod may be more effective than trying to compensate entirely with handheld technique.
Does a Faster Shutter Speed Always Mean a Better Photo?
No.
A faster shutter speed reduces blur, but it also reduces the amount of light reaching the sensor.
If you increase shutter speed from 1/125 sec to 1/1000 sec, you may need to compensate with:
- Wider aperture
- Higher ISO
- More light
The exposure relationship between shutter speed, aperture, and ISO is why sharpness decisions cannot be made independently.
There is also a creative consideration.
Sometimes photographers intentionally use slow shutter speeds to create motion blur.
So the objective isn’t to eliminate every trace of movement.
The objective is to control it.
What Gear Helps With Shaky Hands?
You don’t necessarily need expensive equipment.
1. Image-Stabilized Lens
Useful for handheld shooting, especially with telephoto lenses and in low light.
2. Camera With IBIS
In-body stabilization can provide additional flexibility with compatible lenses.
3. Fast Lens
A wide maximum aperture helps you maintain faster shutter speeds.
4. Monopod
Useful when you need support but still need to move quickly.
5. Tripod
Best for maximum stability with stationary subjects.
6. Remote Shutter Release
Useful for minimizing camera movement during tripod-based shooting.
7. Comfortable Camera Strap
A properly adjusted strap can improve handling and provide another point of contact.
Don’t Buy Gear Before Fixing Your Technique
A more expensive camera won’t automatically produce sharper photographs.
It won’t fix:
- A shutter speed that’s too slow
- Poor camera handling
- Subject motion
- Missed focus
- Incorrect exposure
- Poor support technique
Good technique should come first.
How to Diagnose Blurry Photos Using EXIF Data
Your camera records exposure information in the image’s EXIF metadata.
Check:
- Shutter speed
- Aperture
- ISO
- Focal length
- Lens information
- Focus information where available
If you have a collection of blurry photographs, compare the sharp and blurry frames.
You may discover a pattern.
For example:
Sharp: 1/250 sec
Blurry: 1/30 sec
That strongly suggests shutter speed was a major factor.
A Simple Sharper-Photo Troubleshooting Test
If your images are consistently blurry, perform this test.
Test 1: Photograph a Stationary Object
Use a well-lit subject that doesn’t move.
Test 2: Set 1/250 sec
Take several photographs handheld.
Test 3: Increase to 1/500 sec
Take another series.
Test 4: Use a Tripod
Photograph the same subject using the tripod.
Test 5: Compare at 100%
If the handheld images improve dramatically as shutter speed increases, camera shake was probably contributing to the problem.
Camera-Shake Clue
Look closely at fine details such as text, edges, branches, or architectural lines.
If stationary details show directional double edges, streaks, or duplicated-looking outlines across much of the frame, camera movement is more likely.
If the background remains sharp while a person’s hands, face, or body is blurred, subject movement is more likely.
If even tripod-mounted photographs remain soft, investigate:
- Autofocus
- Lens quality
- Front/rear focus issues where applicable
- Dirty optics
- Diffraction
- Atmospheric conditions
- Camera or lens malfunction
Common Mistakes to Avoid
- Keeping ISO too low and letting the shutter speed become too slow.
- Assuming the 1/focal length rule always guarantees sharp photos.
- Expecting image stabilization to freeze moving subjects.
- Holding the camera far from your face without enough support.
- Forgetting that long lenses magnify small hand movements.
- Using a slow shutter speed for moving people.
- Blaming autofocus for blur caused by camera shake.
- Buying a new camera before improving your technique and settings.
A 10-Second Checklist Before Taking the Photo
- Check subject movement: Use a faster shutter speed for moving subjects.
- Check shutter speed: Make sure it is fast enough to reduce camera shake.
- Check stabilization: Enable it for handheld shooting if available.
- Hold the camera correctly: Use both hands and support the lens from underneath.
- Brace yourself: Use a wall, railing, table, or another stable surface.
- Adjust ISO: Raise it if needed to maintain a faster shutter speed.
- Check aperture: Widen it for more light if reduced depth of field is acceptable.
- Confirm focus: Make sure the intended subject is in focus.
Quick Reference: How to Fix Shaky Hands Photography
If you only remember a few things, remember these:
- Increase shutter speed when camera movement causes blur.
- Use Auto ISO with a sensible minimum shutter speed.
- Open the aperture when you need additional light.
- Don’t fear higher ISO when the alternative is a blurry photograph.
- Use image stabilization when shooting handheld.
- Hold the camera with both hands.
- Support the lens underneath.
- Keep your elbows close to your body.
- Brace yourself against solid objects.
- Use a faster shutter speed for moving subjects.
- Use a tripod for stationary subjects and very long exposures.
- Use a monopod for mobile telephoto work.
- Check EXIF data when diagnosing recurring blur.
- Inspect photographs at 100% rather than relying only on the camera’s LCD preview.
Frequently Asked Questions
1. How do I stop my hands from shaking when taking photos?
Hold the camera with both hands, support the lens from underneath, and keep your elbows close to your body. Use a stable stance and press the shutter gently to reduce camera movement.
2. What is the best shutter speed for shaky hands?
Start at 1/125 sec for general handheld photography. Try 1/250 sec or faster if your hands are unsteady, your subject moves, or you use a long lens.
3. Does higher ISO reduce camera shake?
Higher ISO does not steady the camera, but it allows you to use a faster shutter speed while maintaining exposure. This can reduce visible blur from camera shake.
4. Why are my photos blurry even with stabilization?
Image stabilization cannot freeze moving subjects or correct missed focus. Your shutter speed may also be too slow for the amount of camera movement.
5. Can a tripod completely eliminate blurry photos?
A tripod reduces camera movement, but moving subjects, missed focus, and vibrations can still cause blur. Choose a shutter speed that suits your subject.
6. What is the best camera mode for shaky hands?
Shutter Priority lets you select a fast shutter speed. Aperture Priority with Auto ISO and a minimum shutter-speed setting is another useful option, though the camera may drop below that minimum when it reaches its ISO limit.
7. Does a faster lens help with shaky hands?
Yes. A lens with a wider maximum aperture lets in more light, allowing faster shutter speeds in dim conditions. However, wider apertures also reduce depth of field, making accurate focus more important.
8. Should I turn image stabilization off on a tripod?
Follow your camera or lens manual. Some systems detect tripod use automatically, while others recommend turning stabilization off when the camera is firmly supported.
Final Thoughts
Learning how to fix shaky hands photography doesn’t require expensive equipment or perfect physical steadiness.
Start by identifying the type of blur you’re seeing. If the entire frame shows movement, camera shake may be responsible. If only the moving subject is blurred, increase shutter speed to address subject motion. If the wrong area is sharp, investigate autofocus rather than camera stability.
For most handheld situations, start with a sufficiently fast shutter speed, use Auto ISO when helpful, open the aperture when appropriate, activate image stabilization, and improve your physical shooting position.
When conditions become too demanding, use a monopod, tripod, remote release, or additional light.
The most important lesson is simple: don’t sacrifice shutter speed just to keep ISO low. A slightly noisy photograph can often be improved in post-processing. A photograph ruined by motion blur generally cannot be fully recovered.
With the right combination of settings, technique, stabilization, and support, you can make shaky hands far less of a limitation and produce sharper photographs consistently.